Walk in Heels Without Pain: Fit, Pads & Easy Practice
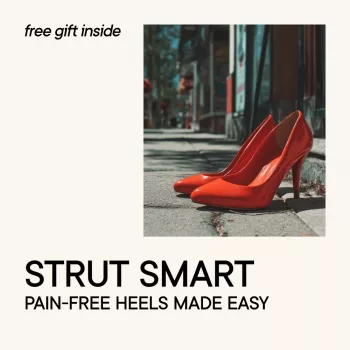
Strut Smart: Pain-Free Heels Made Easy
Heels can look polished and feel miserable—often because of fit, foot mechanics, and pacing rather than “weak ankles.” With a few smart tweaks, it’s possible to walk more steadily, reduce pressure on the forefoot, and last longer at weddings, nights out, and work events without hobbling afterward.
Why Heels Hurt (and What That Pain Is Telling You)
As heel height rises, more body weight shifts toward the ball of the foot. If the toe box is narrow or the sole is thin, that pressure can turn into burning, pinching, and friction fast.
- Forefoot pressure: Higher heels increase load on the metatarsals; tight toe boxes amplify nerve compression and rubbing.
- Common hotspots: ball of foot (metatarsal overload), pinky toe (toe box squeeze), heel (slip and blistering), arch (insufficient support).
- Red flags: numbness/tingling, sharp persistent pain, swelling, or pain that worsens after removing shoes—take a break and consider medical advice.
- Pattern matters: short-term discomfort often improves with fit changes, padding, and technique; recurring pain usually means a different shoe shape or real support is needed.
For general guidance on foot health and when pain signals a bigger issue, the American Podiatric Medical Association (APMA) and Cleveland Clinic’s foot pain overview are helpful starting points.
Start With the Shoe: Fit Checks That Prevent Pain
Comfort in heels starts before checkout. A shoe that’s “almost right” can force your toes to grip, push your weight forward, and create pressure points that no pad can fully fix.
- Size and timing: try heels later in the day when feet are slightly larger; make sure toes can lie flat without curling.
- Toe box test: stand and gently wiggle toes; cramped toes increase friction and neuroma-like symptoms.
- Heel cup test: walk 10–15 steps; excessive heel slip predicts blisters and instability.
- Pitch and platform: a small platform can reduce effective pitch; steep pitch shifts weight forward faster.
- Straps and structure: ankle straps and supportive uppers reduce toe-gripping (a major fatigue source).
Quick Fit Checklist Before Keeping a Pair
| Check | What to feel | Fix if it fails |
|---|---|---|
| Toe room | Toes lay flat; no pinching at the sides | Choose wider toe box; size up if length is tight; avoid pointed toes for long wear |
| Heel stability | Minimal lift at the heel when walking | Add heel grips; choose deeper heel cup; consider ankle strap |
| Ball-of-foot comfort | Pressure feels tolerable and evenly spread | Add metatarsal pads; choose lower heel or slight platform |
| Arch support | Arch feels supported, not strained | Use supportive insoles; avoid ultra-flexible soles |
| Stride test | No wobble; ankle feels aligned | Try a block heel/wedge; reduce height; avoid slippery soles |
Prep Your Feet in 5 Minutes
A little prep reduces friction and “first-hour pain,” especially if you’re heading into a long event.
- Moisturize the night before: hydrated skin is less prone to cracking, but lotion right before wearing can increase slip.
- Anti-blister strategy: apply a thin layer of anti-chafe balm to hotspots (back of heel, sides of toes).
- Nail and callus care: keep toenails short; smooth rough calluses that catch and tear.
- Warm-up: 10 calf raises + ankle circles + toe spreads to wake up stabilizers before stepping out.
Cushioning and Support That Actually Help
Padding works best when it changes pressure distribution—without stealing space your toes need for balance.
- Metatarsal pads: shift pressure slightly backward and can reduce the “burning ball of foot” feeling.
- Gel/foam forefoot cushions: help with impact, but avoid thick pads that crowd the toe box.
- Heel grips: reduce slip, blisters, and the instinct to claw with toes to keep shoes on.
- Arch-supporting insoles: improve alignment and can reduce calf fatigue; ensure they don’t lift the foot so much that the heel pops out.
- Tape options: kinesiology tape can support arches; medical tape can protect rubbing areas (patch-test if sensitive).
How to Walk in Heels Without Pain: Technique Cues
Walking well in heels is less about “toughing it out” and more about controlling where your weight goes with each step.
Practice Plan: Get Comfortable Fast (Without Overdoing It)
If you like timing your sessions (and keeping pace consistent), a simple device like the Bluetooth MP3 MP4 Player with 4.0″ Touchscreen can make practice feel more structured—especially when you’re working on shorter steps and smoother rhythm.
Aftercare: Recover So the Next Wear Feels Better
A Simple Option for Learning the Basics
If you want a step-by-step approach that pulls these tips into one place, Strut Smart: Pain-Free Heels Made Easy – A Complete Guide on How to Walk in Heels Without Pain focuses on practical walking cues, comfort upgrades, and common mistakes that trigger pain.
FAQ
How long does it take to get comfortable walking in heels?
Many people feel noticeably steadier after a few short sessions over 1–2 weeks. Consistency matters more than duration, and a poor fit can block progress no matter how much you practice.
What heel height is easiest to walk in for beginners?
A low-to-mid heel is usually easiest, especially in a block heel or wedge for stability. A slightly roomier toe box and a less steep pitch (or a small platform) often feel more comfortable than a taller, sharply angled stiletto.
Why do the balls of my feet burn in heels?
Heels shift pressure onto the metatarsals, and tight toe boxes or thin soles can intensify that load until it feels like burning. Metatarsal pads, a lower pitch, supportive insoles, and periodic breaks typically help reduce the strain.





Leave a comment